Showing posts with label Spring. Show all posts

Tuesday, May 15, 2012

Mosquitoville

The mosquitoes here this year are bad, really bad.  I have been to Alaska a few times and Canada's Arctic during the summer, those were the worst and largest mosquitoes I have ever experienced but this is running a close second for me.

We have a pond and a slow creek on our property that is prime mosquito-raising terrain which is hard for us to control.  The creek is constantly moving and the pond is full of fish.  Also, our bees get water from the pond so I cannot add anything to that except maybe those little barley things that float.

There's nesting boxes for the swallows and a bat house too in our backyard.  I would hate to think what it would be like if we didn't have those.  

I was trying to plant yesterday evening and was eaten alive by mosquitoes.  Later we had some elk show up at our pond and you could tell that they were being pestered by the bloodsuckers, too.  They jumped, bucked and eventually just gave up and took off running.  I felt their pain.

Friday, May 11, 2012

I'm Breaking Out in Hives!


Beehives that is!  This week I have gone from owning two hives to three.  My two over-wintered hives are boiling with bees and filling with new brood and it's getting mighty crowded.  The only way bees can make room in the hive is by swarming which is good for the bees but not such a happy event for a beekeeper.  Suddenly you lose your mature, egg-laying queen and she takes half the colony with her.
Though it can occur anytime during spring, summer and fall, May is the beginning of swarming season here in North Idaho.  One way to prevent swarming is to remove a three to four frames of brood along with the bees on those frames and replace them with frames that either consist of drawn comb or new foundation.  But incredable thing about removing the frames of brood is that you can place those frames in a new hive and start an additional colony of bees.

The new hive is often called a "split".  You have (hopefully) preempted a swarm from occurring and have a new colony of bees that would cost you anything from $75 to $125 to buy.  

Now you may ask "But where do you get a new queen?"  This is the really cool part:  The new colony will "make" one!  The main ingredient to make a new queen from this split hive are frames of "open" brood.  When the bee larvae are developing in their cells, they are tended by the working bees and are eventually sealed in their chambers to pupate and emerge as worker bees.  

When a colony of bees senses that it is queenless, it can take brood that is young enough and transform it to a larva that will develop into a queen instead of worker.  They feed the larva royal jelly to create a queen.  So when picking out frames from the main colony to create the split it's imperative to select frames that contain freshly laid eggs.  
A new queen will be raised and eventually she will leave the hive on her mating flight.  She will return to the split hive she was raised in and start laying eggs which will grow into workers for the hive.  The new split hive that started three days is the striped one on the right.

Another factor that will insure the success of the new hive is plenty of young bees.  Older, foraging bees that know what it's like to be outside of the hive will return to their original hive since they consider it home.  But all the young bees that were moved to the split hive do not know what their hive looks like from the outside yet.  When they become old enough to start foraging in the outside world they will consider this hive their home.
In the next few days, I'm going to make a split off the other over-wintered hive and it's going into this ugly hive.  Each hive in my bee yard has a different paint job to help the bees recognize and imprint on their home.  If I had all plain hives so close together there is a possibility of what's known as "drift" where bees move between hives thinking they are returning to their regular hive.  This can result in hives that are stronger than others for no other reason than bees are going to the wrong hive.

I'm hoping my next split goes well.  Wish me luck!

Saturday, May 5, 2012

Creamy Morel Mushroom Soup

Spring time is morel mushroom hunting time, more specifically the month of May in North Idaho.  But when we are having a cool Spring and the wily morel is taking its own sweet time to come out in droves, I get out some of my dried morels from last season and make this soup.  I LOVE this soup and I think you will, too.  And dried morel mushrooms are available at many grocery stores so even if you aren't an avid mushroom hunter you can make it, too.

Here is what you will need:
Oops, I forgot to get the cream and flour in the picture!
Ingredients:
  • 1/2 oz of dried morel mushrooms
  • 3 1/2 cups of low sodium chicken broth
  • 1/2 cup minced onion (I used a sweet onion)
  • 1 stalk celery, diced
  • Pinch of dried thyme
  • 4 Tbsp butter
  • 2 1/2 Tbsp of white flour mixed with a pinch of salt and pepper
  • 4 Tbsp white wine
  • 1/4 cup cream 
  • parsley or chives for garnish
Soak the dried morel mushrooms in / cup of the chicken broth for 20 minutes.
Remove the morels from the chicken broth and squeeze the excess moisture back into the remaining stock.
  
Run the morel-infused chicken broth through a coffee filter to remove any dirt or insects that may have been in the dried morels.  I know it may sound gross but sometimes tiny little gnat-like insects remain inside of the morels as they dry and you do not want them floating in your soup.
 
Chop up your rehydrated morel mushrooms.

Melt the 3 tablespoons of butter over medium heat.
Add the dried thyme, diced celery and the minced onions to the heated butter and saute for 3 to 4 minutes.
Add the morel mushrooms and saute for 5 more minutes.
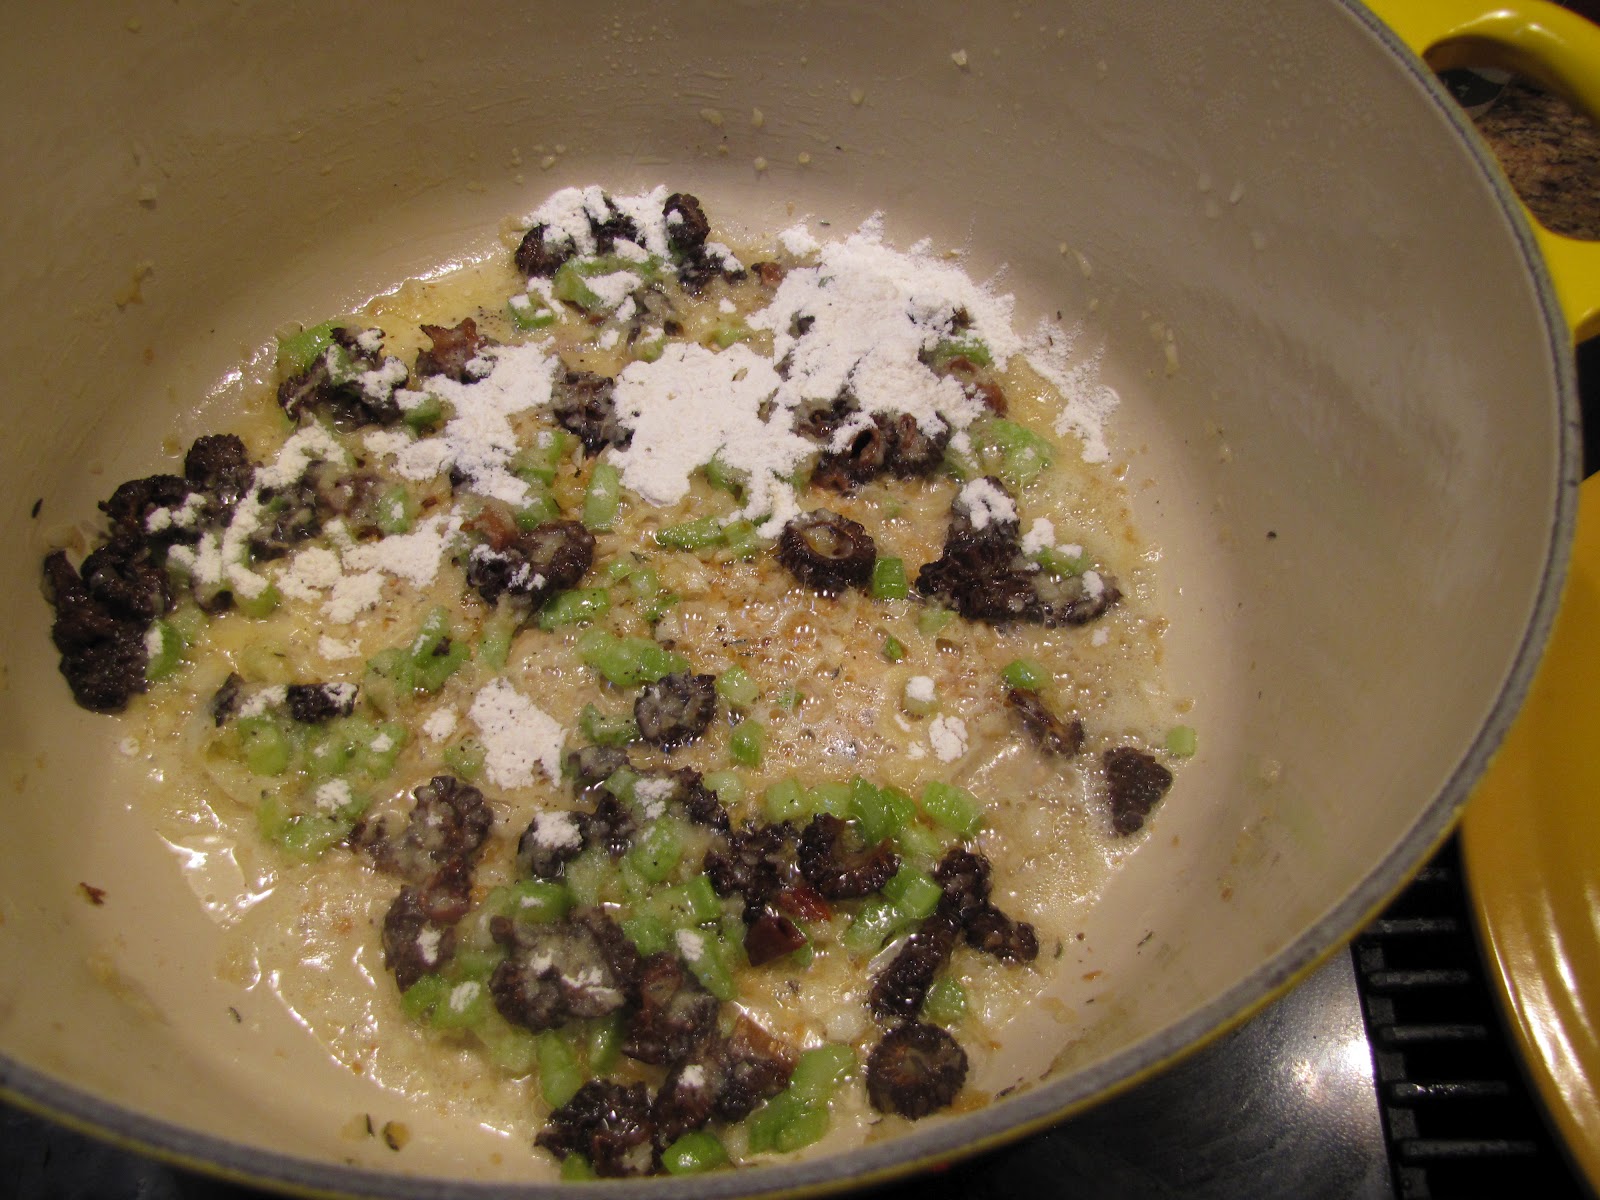
Now sprinkle the flour, salt and pepper mixture over the sauted vegetables.  Continue to cook over medium heat for 5 more minutes but do not brown.
Add the remaining the 4 tablespoons of white wine, 3 cups of chicken broth and the morel infused broth to the pot and bring to a boil.  Simmer this for 10 minutes, uncovered.
After simmering, stir in the 1/4 cup of cream to the soup. 
 
Remove from heat and serve.  Garnish with parsley or chives and enjoy.

Thursday, May 3, 2012

Babies and Blizzards ;)

Again the snow flakes were falling yesterday morning but not really a blizzard...just being a drama queen about it.  But my folks are arriving here this afternoon from Southern California and I would appreciate it if the weather was at its best behavior.  That's asking a lot for this time of year in a place where summer doesn't really begin until after 4th of July.

The grand total on my hatch turned out to be 16 chicks out 17 eggs.  I opened up the egg that didn't hatch and there was a dead chick that pipped the membrane internally but never pipped the shell.  It didn't look like a pip-and-drown though because there was no visible fluid.  It's a mystery to me.  Doesn't stop me, on to my next batch of eggs: blue-laced red Wyandottes and potential olive-eggers which are a cross between Black Copper Marans and blue egg laying Easter Eggers.  Have I lost you yet?  Hopefully not!

Wednesday, April 25, 2012

Tomato Babies

Now what's that old saying?  You can't be too rich, too thin or have too many tomato starts....right? That goes for peppers, too!

Here in North Idaho I have learned not to put the tomatoes out in the garden until June 1st and still there are nights that I have to cover them up due to sub-freezing lows.  I usually start them from seed the first day of Spring. 

My favorite medium to start tomatoes and peppers in are those little peat pellets that you have to expand with water before they are soft enough to place a seed in them.  We have a very small shower stall in our basement bathroom and I put a small space heater in there.  It doesn't take much to heat the stall up to 90F degrees and that is where I place my tomatoes and peppers.  The germinate very quickly in this hot environment but you have to have them in covered containers like the mini greenhouses you buy at any big box store like Walmart or Home Depot or else they will dry out. 

As soon as the seeds emerge, I move them to a sunny, south-facing window sill.  Waiting to move them is not a good idea because in the darkness of the bathroom they will grow very long, and leggy QUICKLY.  Once they develop their first true leaves beyond their seed leaves I transplant them to larger peat pots which are about 4 inches tall and 4 inches wide.  I place the peat pellet at the bottom of the pot and then add seed starting soil until it reaches the base of seed leaves.

The plants develop great root systems in this soft soil and grow quite quickly.  On warmer days, I bring them outside to help harden them up.  I will leave them out all night as long as it doesn't fall much below 50F during the night.  By June, I have nice healthy home-grown starts which are not root-bound like a lot of the nursery-raised ones that I have purchased.  On average my plants are smaller than the ones I have bought at the store but once planted in the garden they grow faster than the store bought ones and end up producing more fruit, too.

Sunday, April 22, 2012

It Really Seemed Like Spring Today!

 Black copper marans enjoying the sun
Today was the third day here since early October of 2011 that was actually in the 70s.  Not too unbelievable around these parts but all my family wanted to do today was to be outside either working or playing.

My daughter's friend had spent the night for a sleepover and this morning we went on a little walk in the back of our property.  My daughter caught a frog but seeing a young bull moose in velvet was probably the highlight of the day.  Of course I didn't bring a camera and of course the moose stood there for a million years because I am sure he knew as well that I didn't bring my camera.

But not getting a moose picture couldn't get me down so later in  the day after taking a break from chores I took a few pictures from around our place.
Our 60 foot compost pile


Having a lot of chickens has it's benefits:  a lot of stuff to compost for the garden.  Also, I have been clearing all the hay that the cattle had knock down into the ground from the hay feeder last winter.  You want to talk about hot stuff,  it compost better than anything I've ever tried and gets really hot very quickly.
First finished garden bed

We have three high-fenced vegetable garden beds.  This is the first one planted so far.  It's kind of strange location because it does get some shade but since it's on a slight slope facing due south, it's the first to heat up and lose it's snow.  The down side is that late summer, early fall it likes to shade up again so it is not great for planting things that take all summer to mature here:  winter squash, pumpkins, tomatoes and green beans are not a great choice to plant in this bed.  Greens, radishes and peas and other cool-loving plants love it though.

I love Ed Smith's "Vegetable Gardening Bible", it's the only book I refer, too.  It's also where I got the idea to cover the walkways with a layer of newspaper and then top it with straw.  Great weed control and it looks tidy.  In the fall, I add leaf litter and compost to the beds and then lay the straw from the walkways on top so the earthworms and night crawlers have a nice cozy bed to work and break down the leaf litter.
Bees....
more bees...
and more bees.


Wednesday, April 18, 2012

Wild Canaries

Goldfinches made their first showing here today on our feeder.  I never saw a goldfinch before until I moved here.  My dad says when he was a kid growing up in Ohio, they called them "wild canaries".  If found that really cute for some reason.

Tuesday, April 10, 2012

"Flipping" the Hives

Yesterday and today I am doing what I believe is called "reversing" the hive bodies on my two beehives.  I personally call it "flipping" the hives but then it does sound like I'm trying to sell them on the real estate market.  If you just started your hive this spring with a package of bees or a nuc hive, this is something you will do next year on your over-wintered hive.

Bees tend naturally to move up in their hives just like they would if they lived in an old hollowed out tree.  But the little brood boxes we provide them to live in are quite finite and early in the Spring we beekeepers need to make room for them.  Or at least make what seems to be apparent room by manipulating the hive bodies and the brood frames they contain.

This time of year there should be a cluster of brood in the top, center frames of the hive.  To make the hive feel more roomy by moving the brood-bearing frames to the bottom box, it leaves an entire hive box for the laying queen to work up into.  She'll feel like she has all this new space to lay more eggs and it hopefully delays the natural drive for the colony to swarm in search of a larger home.

Reversing the hives can be a great feat of lifting if you literally remove each hive body and return them to their bottom board.  I did this last year because I took the procedure quite literally but this year I was a bit wiser and understood better why beekeepers performed this ritual every Spring.  

First, if you use a smoker on your bees, make sure it is working well with a good supply of material to keep it running.  You will be literally taking the hive to pieces and the bees will need to be calmed with the smoke.  Also, bring out an extra empty hive body.  This is going to be a place to park some of the frames from both hive boxes and make them a little lighter to lift.

Go through each frame in the top hive box and move any frame that doesn't have brood into the extra box you bought.  Leave any frames with brood in the top hive box.  If you come across a frame which has your queen on it leave it in the top hive box, too.  Now you are ready remove this top box and carefully place it to the side.

Now you should be bent over looking into your lower hive box.  Go through it just like you did with the top hive box but this time when you find any frames containing brood move those frames to the top hive body to join the other brood frames you pulled already.  Move the queen's frame too if you spot her.  You can leave frames that do not contain brood in the lower box or temporarily move them to the hive box you brought out, this will help reduce the weight of the lower hive box.

Lift the lower hive box off the bottom board and set it aside.  Now you have three boxes of angry bees. (Just kidding!)  Brush off all the dead bees and debris off the bottom board.  Return the top hive body, the one containing all the brood, to the bottom board.  Keep the brood frames to the center spots and fill in the sides spots with any of the non-brood frames that you have in the box you brought out with you.

Place what was once the bottom hive box next on top of the box you just placed.  Any remaining frames that are left in the extra box can be placed into this now top box.  Place the inner cover and lid...you're done!

Wednesday, April 4, 2012

The North Wind Doth Blow...


The North wind doth blow and we shall have snow,
And what will poor robin do then, poor thing?
He'll sit in a barn and keep himself warm
and hide his head under his wing, poor thing. 

I saw this poor little fellow in our front yard this morning and was reminded of this old nursery rhyme.  It has been snowing here all day and after the sunshine we experienced yesterday, it is a bit of a downer but only because I want to get started in our gardens.  Luckily there is always work to be done in the house, in my studio and in our barn.

After spending the first 30 years of my life as a Southern Californian city girl, the idea of four seasons parading by every year was a novel idea when we first moved to North Idaho.  The rhythm and fleetingness of life are so much more clearer to me now and I would not trade it for all the snow-less winters (and springs) in the world.

This too shall pass and spring will come...


Friday, May 1, 2009

Signs of Spring in North Idaho

After the last two longer-than-normal winters we have experienced here, it does not take one long to really appreciate the first signs of spring. The woods come alive with the thumping of ruffed grouse, the crowing of pheasants and the gobbling of turkeys. The chipmunks reappear from their long hibernation searching and scurrying about on the ground looking for food.
For us humans it's time to start planning our veggie garden, mend fences for the arrival of our beef steers and one of my favorite spring diversions, morel hunting. We found some of our first morels of the season just last weekend. Coral mushrooms come out during the second half of morel season and will post some picture of those then we find one.
I have to admit that I am running a little behind on the veggie garden but the weather is so cool this spring I think it will be okay. We will be planting this weekend sugar snap peas and lettuce. I have started my tomato plants on the first day of spring and they seem so tiny compared to the ones I see at the stores which are available right now. I seem to always cave in and buy a couple tomato plants because mine seem so small by the time I plant them the first week of June. But the funny thing is that small they may be the always end up as big as the store bought plants and produce more. I'm going to stay strong this year and resist the urge to buy any tomato plants. I have 20 started plants right now all along our south-facing window sills. Hopefully seeing the big trees out there will inspire them to grow big!
A One Pound Plus Moskvich
My two favorite types to grow here are Moskvich which is a Siberian beefsteak type hybrid and Red Agate which is a determinate saucing variety. I plant a lot of the other favorites, too, like Sungolds and Brandywines which also produce well during our short season.
Emma with a Red Agate
All the tomatos pictures on this post are from our 2007 season. We had tomatos last year but only few fully ripened to color in the garden and a majority of them had to be bagged until ripe. I attended the North Idaho Fair that year and did not see one red tomato! It made me feel so much better to see the blue ribbon winners were big green tomatos. Not that misery enjoys company but I figured if these folks that really know what they are doing still have green tomatos in August then I must not be too much of a failure after all!

Tuesday, April 28, 2009

Mega Tom and Micro Jake

My dad and mom came up for turkey season this month. We had a great visit and my dad had wonderful hunting success! I had success too, but on a MUCH smaller scale.

Our area has a high turkey population. High enough for Idaho Fish and Game to issue depredation permits for out particular game unit. All during the winter the turkeys hang around our chickens stealing their food but when their mating season begins in early spring the jakes and toms disband from the mixed group and cruise around the forest looking for hens.

The tom that my dad got weighed 23 pounds and had a beard that was almost 10 inches long. When he was dressed out he hit 18 pounds on the scale. We did not know the significance of his weight until my husband checked it out on the computer. This was a big turkey that could of ranked high in the Idaho records if we had him officially weighed before preparing him for the table.

I cooked him the same way I do a domesticated bird and he came out wonderfully moist and tender. The only thing that I would say was "tough" were the drumsticks but those legs had to carry a lot of weight probably a mile or so each day so we will forgive the big guy for that. I cook all turkeys covered until the last 30 minutes to brown the skin. The internal temperature reached 170F. A few years back we shot a couple of jakes that cooked up beautifully and suspected that the older toms would not be nearly as tender but this big tom did not disappoint!
Now my little turkey was the polar opposite of my dad's mega tom! When I shot my jake he tumbled into a nearby spring and got himself soaked so he wasn't a very pretty picture when my husband photographed him. He was in a group with 3 other jakes and he had the longest beard (4 inches) in the group so I thought he would be of decent size. Boy, was I wrong! I easily picked him up with one arm he was so little. I didn't weigh him before I cleaned him because he was so wet and dirty I didn't want to put him on my scale. When he was all dressed out he only weighed 9 1/2 pounds.

He's going to make a great eating bird to be sure. Almost all of the bird shot was concentrated on his head and he had only two body shots: one in the neck and one in his back between his wings. Because of his youth he was extremely easy to pick, too. He's in the freezer right now while I decide if I want to bake him or put him in the Bradley smoker.

I purchased a second turkey tag that I can start using beginning May 1st. Maybe I'll have another hunting story to share soon. Wish me luck!

Wednesday, April 8, 2009

Planting Fruit Trees...At Last!

Boy does time go by fast! We have owned our place in Northern Idaho for 12 years now and have never planted a fruit tree. Oh, we've talked about it many times but just never acted upon it. It just seemed kind of daunting to try to figure out what and where to plant. Also, we haven't had the greatest of luck on the few trees that we tried planting here due to the depredations of mice, gophers and deer.
Our home came with three fruit trees: a greenish/yellow apple of some sort that we thought might be a Granny Smith, a tiny plum tree that makes tiny plums and an apricot tree that bloomed so early that it generally got its blossoms froze off. The apple tree usually makes enough fruit some seasons to make a few pies and a batch apple butter.This year, with the encouragement of my brother-in-law Doug, we decided that none of us were getting any younger and it was silly to keep putting off planting fruit trees. Most fruit trees will take at least 2 years to be mature enough to produce any fruit so that even delays the wait for your reward even longer.
We ordered four trees from Stark Brothers: a Honeycrisp semi-dwarf apple tree, a Jonathon dwarf apple tree, an Intrepid standard peach tree and a Harglow standard apricot tree. Honeycrisp is our favorite apple and the Jonathon is a baking apple that blossoms at the same time so they can pollenate each other.
The apricot and peach trees were both described as late blooming varieties which will hopefully work well here. We are at USDA Zone 6 so our winters are not that cold compared to most northern states. But the springs here take a long time to get rolling. It is normal to experience frosty nights here well into the first week of June. I don't dare put our tomato plants in the garden until June.
The sight we picked for our "orchard" was the backyard. It slopes downhill towards the west and to the east is our house which we hope will help divert cold air around it as it travels downhill. The slope continues past the border of the backyard so there is no risk of cold air pooling there either.
Since these trees were bare root we soaked them in water for about 4 hours before planting. Each hole was dug about 2 feet wide and a 1 1/2 feet deep. We mixed the soil from each hole with Eco Organic Compost (1 part compost to 2 parts soil) and 6 TBS of Vigoro Timed-Release All-Purpose Plant Food which feeds up to 6 months. I never use non-organic fertilizers on my vegetables or raspberries but we made the exception this time because we wanted a time-released product to help get these trees well-established. The fertilizer will surely be gone by the time these trees produce fruit...I hope!
To address all of our predation problems we put a layer of defenses (or should I say fences!) around each tree. Before we back filled the the holes, we surrounded them with 2 foot wide hardware cloth to hopefully prevent an attack from the gophers. Then we cut the tops and bottoms off of 2 liter Coke bottles and wrapped the remaining part of the bottle around the base of each tree to deter mice from chewing on the trees at their base. To keep the deer and Greg's geese from nibbling the trees we placed a cylinder of welded 5 foot wire farm fence around each tree. These were stabllized by T post, too.
I'll keep everyone posted on how these trees do. I'm keeping my fingers crossed that they make it!