Showing posts with label Hive. Show all posts

Friday, May 11, 2012

I'm Breaking Out in Hives!


Beehives that is!  This week I have gone from owning two hives to three.  My two over-wintered hives are boiling with bees and filling with new brood and it's getting mighty crowded.  The only way bees can make room in the hive is by swarming which is good for the bees but not such a happy event for a beekeeper.  Suddenly you lose your mature, egg-laying queen and she takes half the colony with her.
Though it can occur anytime during spring, summer and fall, May is the beginning of swarming season here in North Idaho.  One way to prevent swarming is to remove a three to four frames of brood along with the bees on those frames and replace them with frames that either consist of drawn comb or new foundation.  But incredable thing about removing the frames of brood is that you can place those frames in a new hive and start an additional colony of bees.

The new hive is often called a "split".  You have (hopefully) preempted a swarm from occurring and have a new colony of bees that would cost you anything from $75 to $125 to buy.  

Now you may ask "But where do you get a new queen?"  This is the really cool part:  The new colony will "make" one!  The main ingredient to make a new queen from this split hive are frames of "open" brood.  When the bee larvae are developing in their cells, they are tended by the working bees and are eventually sealed in their chambers to pupate and emerge as worker bees.  

When a colony of bees senses that it is queenless, it can take brood that is young enough and transform it to a larva that will develop into a queen instead of worker.  They feed the larva royal jelly to create a queen.  So when picking out frames from the main colony to create the split it's imperative to select frames that contain freshly laid eggs.  
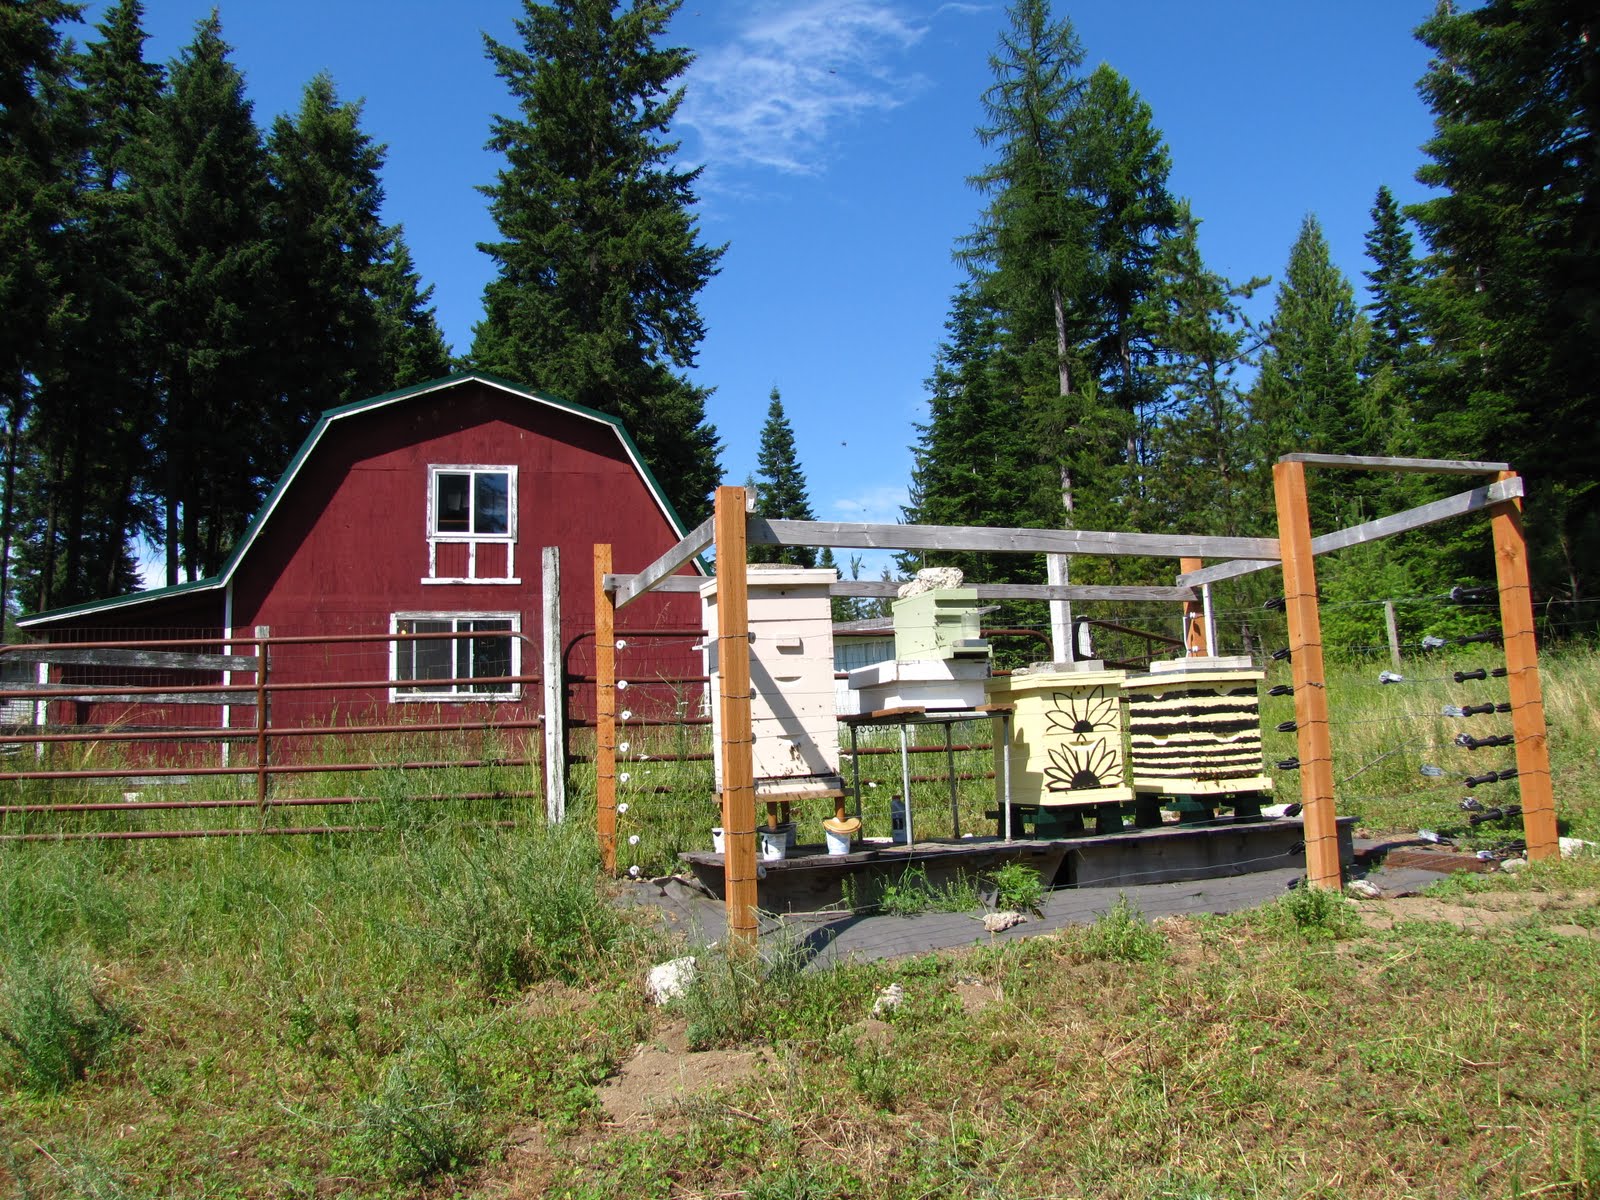
A new queen will be raised and eventually she will leave the hive on her mating flight.  She will return to the split hive she was raised in and start laying eggs which will grow into workers for the hive.  The new split hive that started three days is the striped one on the right.

Another factor that will insure the success of the new hive is plenty of young bees.  Older, foraging bees that know what it's like to be outside of the hive will return to their original hive since they consider it home.  But all the young bees that were moved to the split hive do not know what their hive looks like from the outside yet.  When they become old enough to start foraging in the outside world they will consider this hive their home.
In the next few days, I'm going to make a split off the other over-wintered hive and it's going into this ugly hive.  Each hive in my bee yard has a different paint job to help the bees recognize and imprint on their home.  If I had all plain hives so close together there is a possibility of what's known as "drift" where bees move between hives thinking they are returning to their regular hive.  This can result in hives that are stronger than others for no other reason than bees are going to the wrong hive.

I'm hoping my next split goes well.  Wish me luck!

Tuesday, April 10, 2012

"Flipping" the Hives

Yesterday and today I am doing what I believe is called "reversing" the hive bodies on my two beehives.  I personally call it "flipping" the hives but then it does sound like I'm trying to sell them on the real estate market.  If you just started your hive this spring with a package of bees or a nuc hive, this is something you will do next year on your over-wintered hive.

Bees tend naturally to move up in their hives just like they would if they lived in an old hollowed out tree.  But the little brood boxes we provide them to live in are quite finite and early in the Spring we beekeepers need to make room for them.  Or at least make what seems to be apparent room by manipulating the hive bodies and the brood frames they contain.

This time of year there should be a cluster of brood in the top, center frames of the hive.  To make the hive feel more roomy by moving the brood-bearing frames to the bottom box, it leaves an entire hive box for the laying queen to work up into.  She'll feel like she has all this new space to lay more eggs and it hopefully delays the natural drive for the colony to swarm in search of a larger home.

Reversing the hives can be a great feat of lifting if you literally remove each hive body and return them to their bottom board.  I did this last year because I took the procedure quite literally but this year I was a bit wiser and understood better why beekeepers performed this ritual every Spring.  

First, if you use a smoker on your bees, make sure it is working well with a good supply of material to keep it running.  You will be literally taking the hive to pieces and the bees will need to be calmed with the smoke.  Also, bring out an extra empty hive body.  This is going to be a place to park some of the frames from both hive boxes and make them a little lighter to lift.

Go through each frame in the top hive box and move any frame that doesn't have brood into the extra box you bought.  Leave any frames with brood in the top hive box.  If you come across a frame which has your queen on it leave it in the top hive box, too.  Now you are ready remove this top box and carefully place it to the side.

Now you should be bent over looking into your lower hive box.  Go through it just like you did with the top hive box but this time when you find any frames containing brood move those frames to the top hive body to join the other brood frames you pulled already.  Move the queen's frame too if you spot her.  You can leave frames that do not contain brood in the lower box or temporarily move them to the hive box you brought out, this will help reduce the weight of the lower hive box.

Lift the lower hive box off the bottom board and set it aside.  Now you have three boxes of angry bees. (Just kidding!)  Brush off all the dead bees and debris off the bottom board.  Return the top hive body, the one containing all the brood, to the bottom board.  Keep the brood frames to the center spots and fill in the sides spots with any of the non-brood frames that you have in the box you brought out with you.

Place what was once the bottom hive box next on top of the box you just placed.  Any remaining frames that are left in the extra box can be placed into this now top box.  Place the inner cover and lid...you're done!

Tuesday, April 3, 2012

Hungry Bees?


Spring is really slow coming on, again.  You know it's bad when you get excited about a day that will reach 60F almost a week in advance.  Today was one of those days and tomorrow 1 to 3 inches of snow is predicted to fall.  So, I took advantage of the weather to open the hives and add some more feed to the bees.
My plan was to open the hives, remove a frame and add an inline feeder filled with 1:1 sugar solution.  Also, I had left a frame of drone comb (the green one) that needed to get out of there.  I use them during the active season for varroa mite management but that is a whole other blog entry.  A pollen replacement patty was to be added, too.
This hive is already to go:  feeder in on the right and the patty is laying on the top of the bars.  Look at all those bees!  I guess they survived the winter.
   
Both hives were treated to a new inner cover also.  I feel good at the amount of bees in each hive and hope to make "splits" off both hives so we can go into the main nectar flow with four hives.

This is my third spring with my bees and I am still learning.  One thing I'm second guessing myself on is whether or not the bees even need my help this spring.  When I removed a frame from each hive, it was pretty obvious that there is still honey in the hives.  Should I have let them deplete their honey supply more instead of feeding them?  Not quite sure I am doing what is best for them but then I look at the weather for the next week and we only have rain, snow and highs in the 40Fs to look forward to.  Their only food would be what's in the hive since there would be no foraging in that kind of weather.

Keeping my fingers crossed that I did the right thing.  Hopefully we will have another "warm" day to open the hives and see how much brood the queens are producing.  Stay tuned!

Wednesday, July 27, 2011

First Honey of the Summer

We had family visiting this week from out of town and thought it might be fun to pull a frame of honey from one of the hives to let the kids try some comb honey.
I brought in a nice heavy frame and used a sharp-edged metal spatula to cut off some small chunks for every one. After everyone had their fill of honeycomb I scraped the remaining comb into jars to make chunk honey. Which is jarred honey with chunks of comb in it. It was just beautiful! And the honey was wonderful tasting, too.
If you are new to beekeeping and/or do not have access to a honey exacter, making chunk honey is a great way to harvest your honey and start using it in you home. I plan on extracting my honey but I plan always pulling a frame or two to enjoy the first honey of the season.

Tuesday, July 12, 2011

To Bee or Not to Bee...

Last year we took on the new endeavor of beekeeping. We started with a package of Carniolan bees to install in our first hive. A package of bees consists of a mated queen with 3 pounds of worker bees. I instantly fell in love with our bees and could not wait to check in our hive every weekend.

I cannot recommend beekeeping enough. Keeping a hive or two requires very little time: about an hour a week during from late winter to late fall depending on where you live in the world. It's also amazing to observe the inside of the hive and what the bees are doing, not many people get to witness this.

If you think you might want to try beekeeping, I would recommend reading up on the topic as much as possible both in books and on the web. A great site that you can start reading right now is Beekeeping Lessons created by Long Lane Honey Farms. Beekeeping for Dummies is a fun and educational read that's loaded with information that can get you started in beekeeping.
Also, you will want to find out if there are any local beekeeping clubs in your area that offer beekeeping classes. This is how I started out and it was very valuable to learn with hands-on experience. The day we pick up our first bee package we actually got to watch how to install a package of bees into our hives.

For beekeeping supplies in your area you will save yourself a lot of time by contacting a local beekeeping club to find dealers in your area. Buying online is an option, too. Mann Lake Ltd. has a great selection of everything you need to get started and they offer free shipping on purchases over $100 which is an easy minimum to reach when purchasing your initial hive set up.

After starting one hive, it was a very natural progression to add more bees to our lives. Now a year later we have 4 hives: the one we started last season, a split from our first hive, a new package of bees for my daughter and a small nucleus hive that was also split from our first hive. Our limiting factor is the size of our bee yard which we had to construct to help prevent the neighborhood bears from helping themselves to the honey buffet.

My hope is after reading this post that your interest in beekeeping will be perked and you may consider taking this one as a hobby for yourself. If you have heard the news about the decline of the honeybee in nature and wondering how you can help, well starting a hive is the best way to bring bees back to our gardens again.