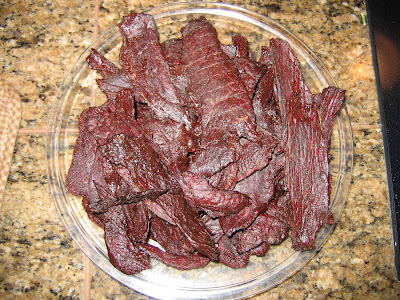
This last weekend I wanted to make something in the smoker that was really easy. Emma and I were just getting over a bad case of the flu and poor Greg was in the middle of it. So, to get the satisfying feeling of accomplishing something but not having to spend a ton of time in the preparation of it, I decided to make jerky from a Hi Mountain jerky kit. I highly recommend these kits that are available at sporting good stores and online. The variety flavors are great and directions clear and easy to follow. They work for whole meat jerky and ground meat jerky with two separate directions for both versions.
I'm not going to give all the details because one needs to follow the Hi Mountain 's directions for success but I'll share some pics of what my batch looked like at various stages of preparation. I started with 3+ pounds of venison roast. Hi Mountain's Original Blend is the flavor I used this time around.
I'm not going to give all the details because one needs to follow the Hi Mountain 's directions for success but I'll share some pics of what my batch looked like at various stages of preparation. I started with 3+ pounds of venison roast. Hi Mountain's Original Blend is the flavor I used this time around.
 After trimming and slicing your meat make sure you weight it. This is how you accurately figure out how much season and cure you need to mix up from your kit. I love using my digital kitchen scale.
 The slices need to be patted dry with a paper towel. Place the slices flat on a cookie sheet and sprinkle with the season-cure mixture evenly on both sides.
 Once you are done covering the meat with the mixture, put it in a big bowl and mix it up to get the seasons and cure evenly distributed.
 Now the seasoned and cure-added meat needs to cure for 24 hours in the fridge. After 24 hours it is ready to place on jerky racks and place into the smoker.
 I cooked the jerky at 200F and applied an hour and a half of smoke during the first part of the cooking process. I used Bradley's Special Blend bisquettes since I recently received a variety pack from Bradley and had not tried the blend before. The entire cooking process took about 3 hours.
 I'm not exactly sure how to take the internal temperature on a piece of jerky so I just check for doneness by touch. It should be dried but still flexible enough to bend without breaking. Also, there should not be much give when you squeeze it between your fingertips.
When cooked let it rest on the kitchen counter until cool. Then place it in a zip lock bag in the fridge. This will allow the jerky to release a little moisture to its surface and give it a beautiful glossy finish. Now you will have some great jerky that tastes and looks like a pro made it.

No comments:
Post a Comment