Monday, April 30, 2012

Canadian Bacon Update

Well, 9 days into curing I started thinking and worrying about my Canadian bacon's 21 day cure.  I wasn't worried about the safety of it but more concerned about the how salty it would end up.  So, I posted my concerns on the Bradley Smoker Forum and got some great guidance.
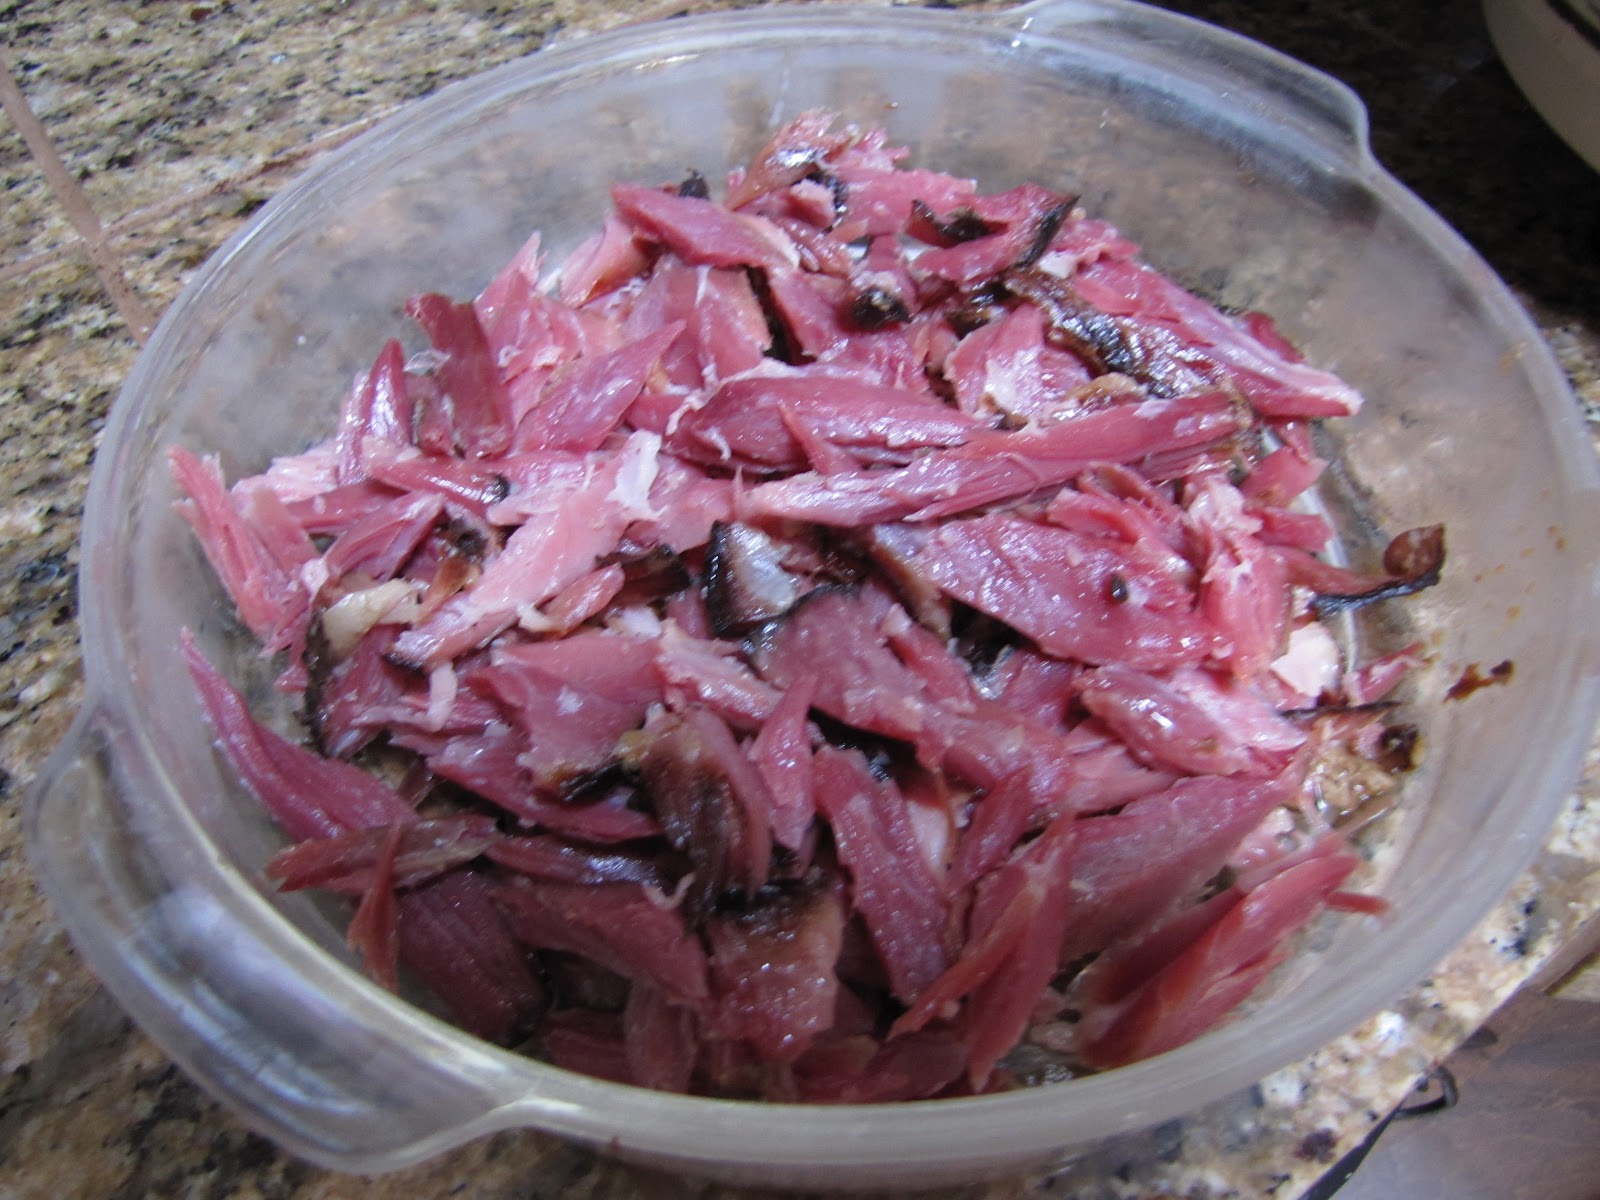
Some of the forum members were not quite sure about the 21 day cure either so it was nice to know I wasn't completely crazy.  One member told me to slice into the meat to see if it cured all the way through.  What he said was that if it was a nice pink color all the way through, it was completely cured to the core.  As you can see it was.
 
Now I knew that it had cured safely, I could rinse off the pieces of loin under cold water.  This washed off any extra cure and maple syrup.
The other quality I was to check for was its saltiness.  By taking a bit off and cooking it, I could taste the level of salt.  I took off three bits for each family member to taste and get their opinion.  Don't those pieces look a lot like regular pork belly bacon?  Our meat processor left a fat-laden strip of meat along the length of the loin which I'm not sure is usually on a pork loin but I don't care because I'm a big fan of pork fat!
Fried up these three pieces and they really tasted GOOD but were a bit saltier than we like.
 
To draw out a little of the salt, I soaked the loins for an hour in 3 gallons of cold water.
After the soaking, I dried them off and tied them with string to keep them together.  They will dry overnight, uncovered in the fridge on a rack.  Tomorrow they go into the smoker. Stay tuned!

Saturday, April 28, 2012

Just Working Around the Farm Today

We had wonderful, rainless weather today and we worked outside almost all of it.  But before I when out to work I had to take my batch of 17 Black Copper Marans eggs out of the turner and increase the humidity since they are due to hatch on Tuesday.

Garden #2 is almost completely planted today with the exception of one part which I'm going to plant sunflowers after the danger of frost has passed.  What I did plant was carrots, beets, turnips, rutabagas, parsley, dill and several types of lettuce.  As you can see, we started lining the walkway surrounding the bed with newspaper and straw but I ran out of straw.  I'll get more on Monday.

On my way to the barn, I noticed that some great-horned owls babies in a nest on our neighbors place have finally grown big enough to be seen.  They are right about 20 yards from our fence line very close to where my chickens free-range.  We have seen the parents hunting rodents out in our cattle pasture and they are yet to snatch one of my birds.  I'll be keeping my fingers crossed on that one.

Friday, April 27, 2012

The First Morel and Other Fun Today

 
Today was a special day because my daughter Emma found the first morel mushroom of the year.  Just one, but one more than none!

Also, Emma had her first "customers" at her homemade thistle feeder today.  She made it using a 2 liter soda bottle and wooden skewers.

And just for fun, we made Bentley into a prehistoric creature.  Those are rooster spurs by the way.

Thursday, April 26, 2012

The "Indoor" Flock


Blue-Laced Red Wyandottes
To be honest, I really don't know exactly how many chicken we actually have here on the farm.  I know there's about 50 in our free-ranging laying flock which is housed in two chicken houses outside.  Then we have our birds housed in the barn.
Young birds
There is a lot of wasted space in the barn but we do have four nice poultry runs housing some of the birds I have separated to keep their eggs pure for hatching purposes.  Also, one run has some juvenile birds that are growing out.
Bearded Silkies  


The adult birds include bearded silkies, blue-laced red Wyandottes and Belgian bearded D'uccles.  I am currently collecting eggs from all the adult pens to do one last hatch for the season.
Bearded Belgian D'Uccles

Wednesday, April 25, 2012

Tomato Babies

Now what's that old saying?  You can't be too rich, too thin or have too many tomato starts....right? That goes for peppers, too!

Here in North Idaho I have learned not to put the tomatoes out in the garden until June 1st and still there are nights that I have to cover them up due to sub-freezing lows.  I usually start them from seed the first day of Spring. 

My favorite medium to start tomatoes and peppers in are those little peat pellets that you have to expand with water before they are soft enough to place a seed in them.  We have a very small shower stall in our basement bathroom and I put a small space heater in there.  It doesn't take much to heat the stall up to 90F degrees and that is where I place my tomatoes and peppers.  The germinate very quickly in this hot environment but you have to have them in covered containers like the mini greenhouses you buy at any big box store like Walmart or Home Depot or else they will dry out. 

As soon as the seeds emerge, I move them to a sunny, south-facing window sill.  Waiting to move them is not a good idea because in the darkness of the bathroom they will grow very long, and leggy QUICKLY.  Once they develop their first true leaves beyond their seed leaves I transplant them to larger peat pots which are about 4 inches tall and 4 inches wide.  I place the peat pellet at the bottom of the pot and then add seed starting soil until it reaches the base of seed leaves.

The plants develop great root systems in this soft soil and grow quite quickly.  On warmer days, I bring them outside to help harden them up.  I will leave them out all night as long as it doesn't fall much below 50F during the night.  By June, I have nice healthy home-grown starts which are not root-bound like a lot of the nursery-raised ones that I have purchased.  On average my plants are smaller than the ones I have bought at the store but once planted in the garden they grow faster than the store bought ones and end up producing more fruit, too.

Tuesday, April 24, 2012

Canandian Bacon II: Adding Some Sweetness

One day three of my Canadian Bacon Project, I added 1/3 cup of Grade B Maple Syrup.  I have been turning the pieces of pork loin in their individual bags and they are definitely curing and firming up.

I take back what I said about Grade B Maple Syrup not being for pancakes, too.  I might try it sometime, it's stronger and richer than Grade A but it tastes good.  In the past I have only used it for making pumpkin pies.

The three week cure continues and I will take the pork loins out once a day to turn in their bags then return them to the fridge.  I will keep you all posted though it's a bit like watching paint dry.

Sunday, April 22, 2012

It Really Seemed Like Spring Today!

 Black copper marans enjoying the sun
Today was the third day here since early October of 2011 that was actually in the 70s.  Not too unbelievable around these parts but all my family wanted to do today was to be outside either working or playing.

My daughter's friend had spent the night for a sleepover and this morning we went on a little walk in the back of our property.  My daughter caught a frog but seeing a young bull moose in velvet was probably the highlight of the day.  Of course I didn't bring a camera and of course the moose stood there for a million years because I am sure he knew as well that I didn't bring my camera.

But not getting a moose picture couldn't get me down so later in  the day after taking a break from chores I took a few pictures from around our place.
Our 60 foot compost pile


Having a lot of chickens has it's benefits:  a lot of stuff to compost for the garden.  Also, I have been clearing all the hay that the cattle had knock down into the ground from the hay feeder last winter.  You want to talk about hot stuff,  it compost better than anything I've ever tried and gets really hot very quickly.
First finished garden bed

We have three high-fenced vegetable garden beds.  This is the first one planted so far.  It's kind of strange location because it does get some shade but since it's on a slight slope facing due south, it's the first to heat up and lose it's snow.  The down side is that late summer, early fall it likes to shade up again so it is not great for planting things that take all summer to mature here:  winter squash, pumpkins, tomatoes and green beans are not a great choice to plant in this bed.  Greens, radishes and peas and other cool-loving plants love it though.

I love Ed Smith's "Vegetable Gardening Bible", it's the only book I refer, too.  It's also where I got the idea to cover the walkways with a layer of newspaper and then top it with straw.  Great weed control and it looks tidy.  In the fall, I add leaf litter and compost to the beds and then lay the straw from the walkways on top so the earthworms and night crawlers have a nice cozy bed to work and break down the leaf litter.
Bees....
more bees...
and more bees.


Friday, April 20, 2012

First Attempt at Canadian Bacon

Here we go again, curing and smoking some pork.  This time I am going to make my first Canadian bacon. The recipe I'm working is from the Bradley Recipe Site.  This recipe requires a three week curing time which is very different from anything I have ever tried in the pass and is going to make this blog entry into a two or three parter. I'm going with this recipe because it calls for maple sugar cure and grade b maple syrup, two things I have on hand and would like to use.  So, for this recipe you will need only three ingredients:
  • Pork loin
  • Maple sugar cure, used to the manufacturer's specifications.
  • Grade B maple syrup, this is not the kind you put on pancakes but it's best used for cooking.
My pork loin was a half portion weighing in at five pounds and after trimming the exterior fat from it, ended up weighing in at three and a half pounds. I cut this half.
The maple sugar cure was from Cabela's.  Their directions for dry rub application was 0.07lb per pound of meat.  For the amount of meat I had I calculated 3.5 pounds of meat would need about 0.25 pound of cure which would be 4 ounces.  Does that make sense?  I rubbed 2 ounces of cure on each half.
 
Each half was placed in its own one gallon zip loc bag.  Now they are in the fridge and I am turning them everyday.  After 3 days, I will be adding the maple syrup to them and promise to keep every one posted on the progress.

Wednesday, April 18, 2012

Wild Canaries

Goldfinches made their first showing here today on our feeder.  I never saw a goldfinch before until I moved here.  My dad says when he was a kid growing up in Ohio, they called them "wild canaries".  If found that really cute for some reason.

Tuesday, April 17, 2012

Garlic Herb Chicken

 
To be truthful, I am not a big fan of boneless, skinless chicken breast.  They are pretty plain, potentially dry and flavorless.  The word I like to use is "insipid".  But if you cook them and retain their moisture, add a bit of flavor, chicken breast can be a great blank canvas.

This is my favorite recipe for boneless, skinless chicken breast and it's easy!  Here's what you'll need:

Ingredients
3 Tablespoons extra virgin olive oil
3 garlic cloves, sliced thinly
Salt
Pepper
1 cup of white wine ( chardonnay is my favorite)
1 Teaspoon of dried herbs (rosemary, herbes de provence, thyme all work well)
4 boneless, skinless chicken

Place an oven-safe plate in the oven and set the heat to Warm.
 
Salt and pepper both sides of the chicken breast and set aside.
Heat the extra virgin olive oil over medium heat in a saute pan with a good-fitting lid or Dutch oven.  Add the sliced garlic and cook until they are about the color of a potato chip then remove with a slotted spoon.  Do not let them get too dark because they can turn bitter. We want our olive oil infused with great garlic flavor and burnt garlic is not the way to get there.
Keep the heat at medium and add the chicken breast to the pan and brown on each side.
Add the cup of white wine, pour slowly to reduce splattering.  I prefer using a dry white wine like chardonnay but use what you enjoy the most.  
Also, add the teaspoon of herbs, I used herbes de Provence this time around but rosemary and thyme work equally well .  If you are using fresh herbs from your garden you should use a tablespoon of them, finely chopped.
 
Once the liquids begin to simmer reduce the heat to low and cover.  Let cook for 10 minutes.  After 10 minutes are up, remove the chicken breast and place them on the heated plate that was warming in your oven.  Keep the breasts in the oven while you reduce the sauce.
Raise the heat to medium to reduce the white wine sauce.  Keep stirring until the sauce reduces by about half and thickens a bit.
Remove from the heat and return the warmed chicken breast back to the pan.  Smother them in the sauce and they are ready to serve.  Hope you enjoy this recipe.


Monday, April 16, 2012

Long Live the Queen!

Earlier in March, it was still too cold to open the hives and check out what was going on.  We just hadn't hit that magic 60F mark where you can safely open the hive without chilling the new brood inside.  But what maintenance I was able to do was to remove some of the winter dead from the hives.

There are always bees living their lives and eventually dying in the hives.  Bees are very tidy little things and they will remove any dead bees that accumulate at the bottom of the hive by either pushing them out or carrying the corpses away from the hive and dropping them in mid flight.  Kind of an aerial burial.

In the winter months the bees maintain a "winter cluster" so they can keep themselves and the queen warm enough to survive the cold.  Since it can be life or death for a bee to leave this cluster just to remove a fallen sister from the bottom of the hive, this time of year the bees let the dead accumulate at the bottom of the hive.  This isn't often a problem unless so many dead bees pile up that their bodies block of entrance of hive which impede good air circulation and hive-bound bees.

Like I mentioned before, I did come out in early March to remove some of these dead bees from my two hives.  I just use a straight, skinny stick between a quarter and half inch for this job.  It is shoved into the hive and sweeps out the dead bees as you remove it at an angle.  Kind of like removing a tennis ball from under your bed with a broom handle:  You'd put the stick in straight and then pivot the stick on the way out to "plow" the ball out.

Now I was doing this on the hive that was started in Spring of 2010 from a package of Carniolan bees.  While I was scooping out the dead bees which I was expecting to be all workers, out comes a dead, unmarked Carniolan queen.  She was recently dead because she wasn't dried up like many of the workers and all I could think was "Oh no!!!".  

When I bought my package of bees in 2010, it came with a marked queen.  She had a little royal blue dot painted on he thorax which made her not only easier to spot but also the color shows the year she was hatched.  Blue is for years ending in "0" and their is a standard color for each year so beekeepers can know how old their queen is.  I guess this can be hard to keep track if you have many hives.  The dead queen that I removed was not marked so it was produced in the hive at some point unlike my "store bought" queen.

To thicken the plot I need to add that all of last season (2011) I never spotted my original marked queen.  The hive had produced many swarm cells, even after I made a split from it and I assumed that she had possibly either swarmed at one point or was killed and replace by a new queen which the colony had made.  So, seeing this dead queen made me think that this was "the" queen and I was going into spring with a queenless hive.

Now a week ago when I reversed the hive, I noticed brood right off and breathed a sigh of relief that there was indeed a queen in there.  Upon further investigation I found my original marked queen that I hadn't seen since 2010!  I couldn't believe it!

So, what does this all mean?  The dead queen is the daughter of old "Blue Dot" but how long had she been in the hive?   Did she emerge in the fall or during the early spring?  Did she duke it out with her mom in a fight to the death or did the workers kill her?  Any light shed on this topic would be greatly appreciated so if you have any ideas let me know.

Saturday, April 14, 2012

Three Ingredient Pork and Beans


I said I would share my super easy pork and beans recipe that I have been using for over twenty years.  It really is three ingredients if you don't count water as one.  Here is what you'll need:

Ingredients
1 pound bag of pinto beans
3 dried chilis (I used Guajillo chiles)
1 good sized ham hock or chunk of salt pork

This recipe was cooked in a six quart crock pot.  You will want to start this recipe early in the day before you want to eat it. 

Rinse and pick over your pound of pinto beans.  If you have a dried bean that you like better than pinto beans, give them a try.  Put the beans in your crock pot and cover them with water.  Let them soak all day and add more water if they soak it all up.

 
Before you go to bed, add enough water to your soaked beans to a level about an inch above the top of the beans.  Place your three dried chiles on top.  I used a pretty mild guajillo chile but you can use any kind you like.  The guajillo does have great flavor and works well if you have kids (like I do!) that aren't quite ready for really hot food.  Turn your crock pot on low and let it cook all night, covered.

The next morning give the beans a stir and add more water if they need it.  They will continue to absorb water has they cook so more can be added as need.
Before you put the lid back on the crock pot place your ham hock on top of the beans.  I used the ham hock that I smoke on Easter.  Return the lid to the crock pot and continue to cook for 8 hours at low.
After 8 hours of slow cooking remove the ham hock and the chiles.  Discard the chiles and once the ham hock is cool enough to handle, strip all the meat off of it.
Return the meat back to the beans and enjoy.  Our family really loves to have a side of cornbread when I serve these beans.

Howdy Neighbors!

This morning I was out taking care of the chickens and noticed these elk in our cattle pasture finding something to eat.  Not sure what that something is.  As you can see the pastures is far from being green yet.  Spring takes a while to get rolling here.

Friday, April 13, 2012

The Hatch Continues...

One chick hatched before our bed time last night.  Upon waking this morning there was still the one chick and a new pip.  As you can see in the picture, the pip is now zipping.

Now out of nine eggs we have 2 chicks and 4 pips.  What a difference three hours has made!

Thursday, April 12, 2012

Pip, Pip, Hooray!

Today is day 20 on that batch of Black Copper Marans eggs that I had set in March.  Originally I started with 14 eggs but had to cull 5 of them because they did not develop.  I'm not certain if maybe the room I had the incubator in got too cold one night or the fertility is off, but this is the most I have ever had to cull from eggs that came from my own birds.  Kind of disappointing especially when I'm trying to fill an order for chicks.  I just set another batch of 19 eggs from the same flock in my other incubator and we will see how many of those develop.

I woke up this morning to see one pip and this is all I have right now.  Black Copper Marans eggs hatch best for me when I use a dry incubating technique for the first 18 days then 65-70% relative humidity for days 18-21.  Zero water is added to the incubator for those 18 days since these eggs do not dry down as readily as lighter-colored eggs.  I have ran lighter eggs with them when using this techinque but it does seem to dry the lighter eggs down too much and results in a lower success rate for those eggs.

The hygrometer that I use does not read lower than 20% humidity and does not even register a reading when the incubator is ran with no water in it.  I know some folks that use this technique for all types of chicken eggs that have had great results so the humidity of the surrounding environment in which the incubator sits plays a part.  But in a wood-heated house in the Northwest, the environment here does not have a lot of humidity to share this time of year.

When we get some chicks to show you all, I will post an update.